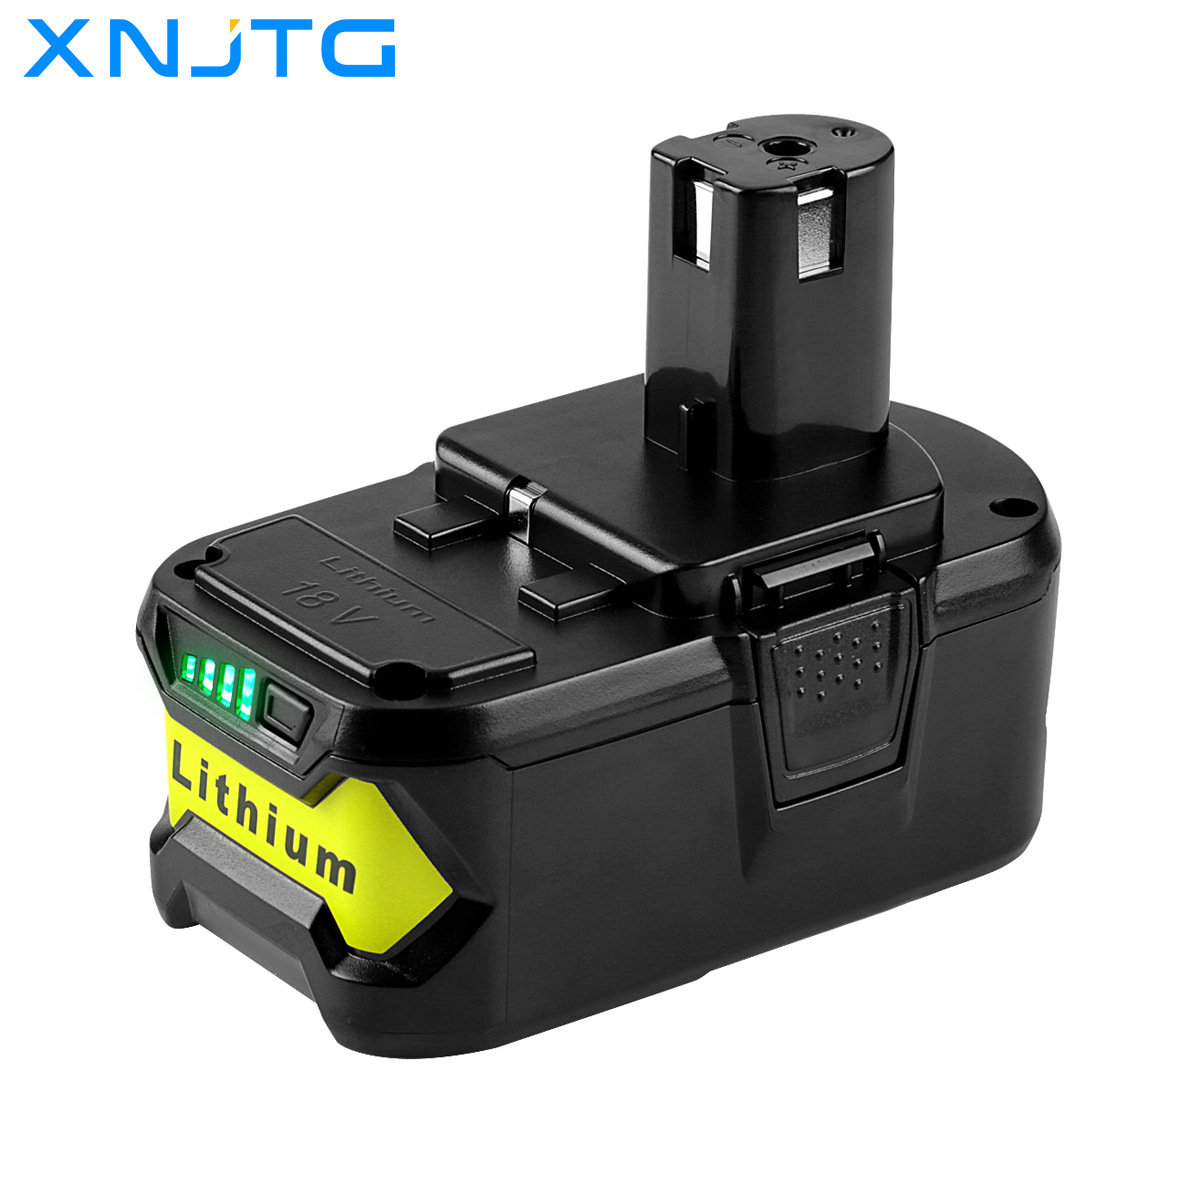
RYOBI P108 BPL-1815, BPL-1820G, BPL18151, BPL1820, P102, P103 P104, P105, P106, P107
RYOBI BPL-1815, BPL-1820G, BPL18151, BPL1820, P102, P103 P104, P105, P106, P107
RYOBI ONE+ 18 Volt Cordless Drill Power Tool BID-1801M, BID-180L, BID1821, BIW180, CAD-180L,
CAG-180M, CAP-1801M, CCC-1801M, CCC-180L, CCD-1801, CCG-1801M, CCG-180L, CCS-1801/DM, CCS-1801/LM, CCS-1801D, CCS-1801LM, CCW-180L, CDA-18021B, CDA1802, CDA18021B, CDA18022B, CDA1802M, CDC-181M, CDI-1802, CDI-1802M, CDI-1803, CDI-1803M, CFA-180M, CFP-180FM, CFP-180S, CFP-180SM, CHD-1801M, CHI-1802M, CHP-1802M, CHV-180L, CHV-18WDM, CID-1802M, CID-1803L, CID-1803M, CID-182L, CID-183L, CJS-180L, CJS-180LM, CJSP-1801QEOM, CJSP-180QEO, CJSP-180QEOM, CMD-1802, CMD-1802M, CMI-1802,
CMI-1802M, CML-180M, CNS-1801M, CNS-180L, CP-180M, CPD-1800, CPL-180M, CRA-180M, CRH1801, CRO-180M, CRP-1801, CRP-1801/DM, CRP-1801D, CRS 1803, CRS-180L, CSL-180L, CSS-1801M, CSS-180L, CST-180M, CTR-180L, CW-1800, LCD1802, LCD18021B, LCD18022B, LCD1802M, LCS-180, LDD-1802, LDD-1802PB, LDD1801PB, LDD1802PB, LFP-1802S, LRS-180, OBL-1801, OCS-1840, OGS-1820, OHT-1850, OLT-1830,
OPS-1820, ORS-1801, OWD-1801M, P200, P2000, P2002, P201, P203, P204, P206, P2060, P208B, P210, P2100, P2102, P2105, P211, P220, P221, P230, P234G, P236, P240, P2400, P241, P246, P250, P2500, P2600, P2603, P271, P300, P301, P310, P3200, P3300, P3310, P340, P400, P410, P420, P430, P500, P501, P506, P510, P514, P520, P521, P522, P530, P540, P570, P600, P610, P631K, P650, P700, P701G, P703, P704, P710, P711, P715, P716, P730, P731, P740, P741, P780, P813, P835
Hot selling/New Arrivals
Vacuum cleaner battery/Charger
Frequently asked questions
ask:What are the main battery cells of your product?
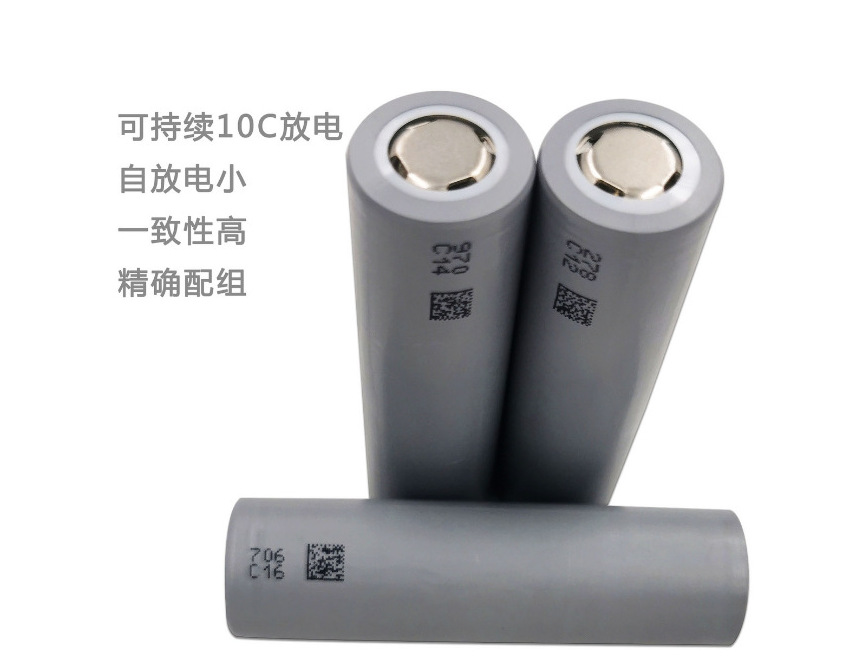
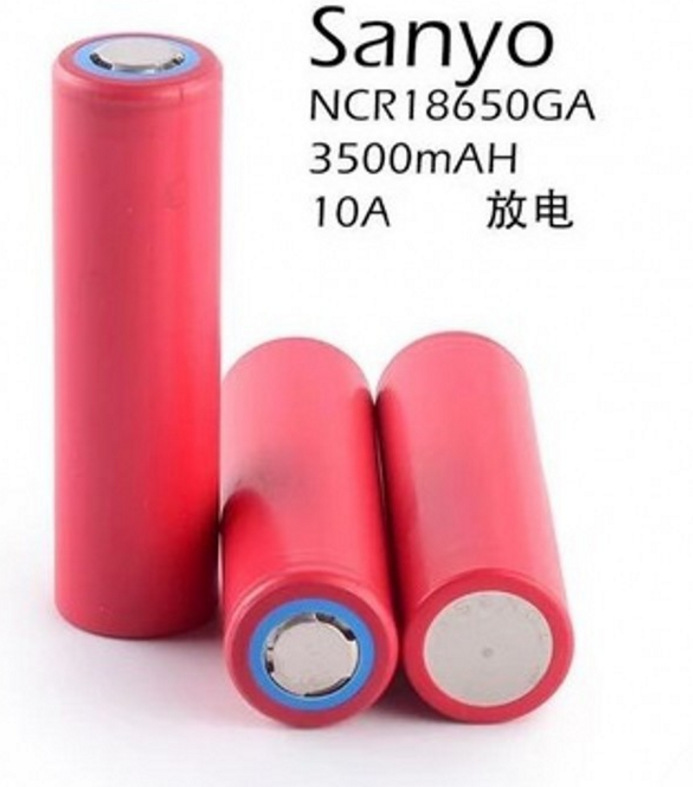
answer:We have imported and domestically produced battery cells. Imported battery cells mainly use imported batteries from Sony, Samsung, and LG brands as our power tool batteries, which have 100% high quality
ask:Can you accept customized products?Can we do a dropshipping?
answer:We support sample customization, which can customize the capacity and brand LOGO required by customers. At the same time, all of our products support ordering one piece for shipping
ask:What brands of products do you mainly produce, which brands do you supply to e-commerce platforms, and which platforms do your customers mainly work on?
-answer:We mainly produce replacement batteries for brands such as Dyson, Makita, Lioubi, Bosch, Miwoqi, and DeWei. Our customer base includes platforms such as Amazon, eBay, AliExpress, and LAZADA
Ask:What is the monthly production capacity of your factory?What is the size of the factory?
Answer::Our factory is located in Dalang Town, Dongguan City, with a monthly output of 80000 batteries and a factory area of over 2300 square meters. We welcome customers to visit our factory for on-site inspection
ask:What is your usual shipping time and lead time?
answer:That afternoon at 15:Orders placed before 00 can be shipped on the same day. Delivery within the province usually takes 2 days
ask:Do you have after-sales guarantee for your products?How long does the warranty last?
answer:All of our products have undergone relevant quality testing and certification, and can be exchanged within 15 days with a 13 month warranty
ask:What certifications have your factory products passed and are they
answer:Our products have certifications such as FCC, CE, ROHS, quality inspection reports and MSDS, as well as shipping inspection reports
------------------------------------------------------------------------------------------------------------------------------------------------
Daily maintenance of lithium batteries:
1. Newly purchased lithium batteries always have some charge, so users can use them directly when they receive them, using up the remaining power before charging. After this process, 2~Three normal uses can fully activate the activity of the lithium battery. Here is a special reminder:Don't believe salespeople or rumors online, new lithium batteries need to be activated for up to 12 hours when first used
2. Lithium batteries do not have a memory effect and can be charged as needed. However, it should be noted that lithium batteries cannot be discharged excessively, as excessive discharge can cause irreversible capacity loss. When the machine reminds you of low battery level, you should start charging immediately
3. In daily use, newly charged lithium batteries should be stored for half an hour until their charging performance is stable before use, otherwise it will affect the battery performance
When not using the instrument, be sure to remove the battery and store it in a dry and cool place
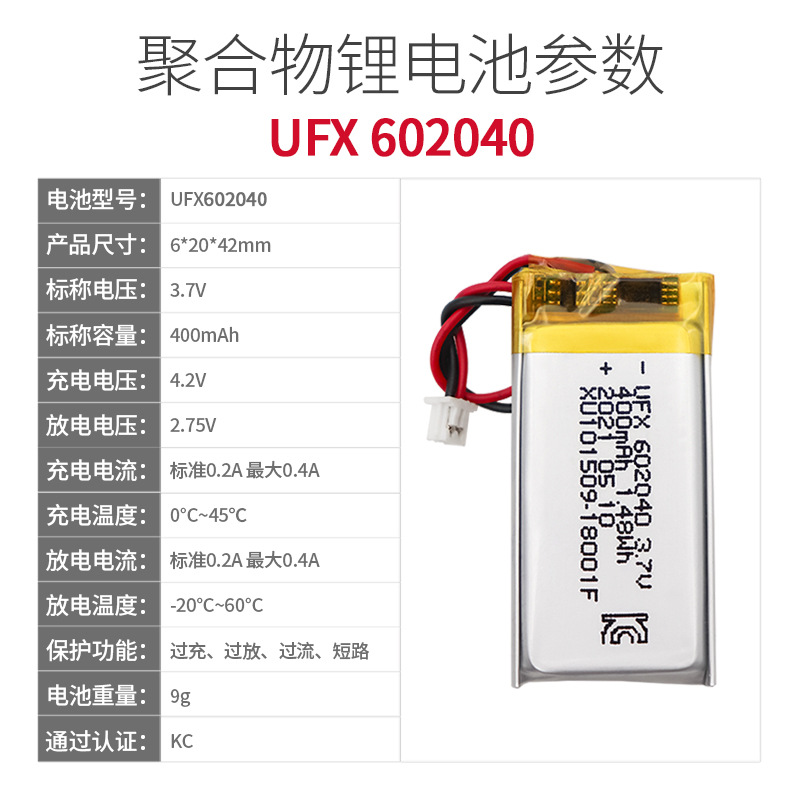
5. Pay attention to the usage environment of lithium batteries:The charging temperature of lithium batteries is between 0 ℃ and 45 ℃, and the discharging temperature of lithium batteries is-20℃~60℃.
6. Do not mix batteries with metal objects to prevent metal objects from touching the positive and negative terminals of the battery, causing short circuits, damaging the battery, and even posing a danger
7. Do not tap, puncture, step on, modify, or expose the battery to sunlight. Do not place the battery in environments such as microwave or high voltage
8. Use a legitimate matching lithium battery charger to charge the battery, and do not use inferior or other types of battery chargers to charge the lithium battery
How to store lithium batteries without long-term use
1. Lithium batteries that are not used for a long time should be charged to 50%~80%Take out the battery from the instrument and store it in a dry and cool environment. Charge the battery every 3 months to avoid prolonged storage and irreversible capacity loss caused by self discharge leading to low battery level
2. The self discharge of lithium batteries is affected by environmental temperature and humidity. High temperature and humidity can accelerate the self discharge of the battery. It is recommended to store the battery in a dry environment between 0 ℃ and 20 ℃
-----------------------------------------------------------------------------------------------------------------------------------------
Production process steps of batteries
Plate weighing
1. Firstly, the internal plates of each battery should be weighed and matched. The capacity of each cluster should be equal, otherwise the group with smaller capacity will be fully charged in advance due to its smaller capacity, while the group with larger capacity will not be fully charged yet. The terminal voltage of the battery is lower, and the group with smaller capacity will continue to charge even before it is fully charged, resulting in the formation of a group with smaller capacity. If the group with smaller capacity is discharged, the advance power will be depleted, and the terminal voltage of other batteries is higher, and the total voltage of the battery will not have the termination protection voltage of electric assistance, causing the discharge to continue
Overcharging, overdischarging, and untimely charging of batteries can all affect their service life. However, the smaller group of batteries further declines, and the decrease in battery capacity further leads to overcharging and overdischarging of the group. This cycle causes the battery capacity to quickly decrease and be scrapped
2. Processing of electrode plates before weighing
Before weighing the electrode plate, it is necessary to remove any excess front edges, burrs, and active substances during paste application. If not cleaned properly, it can cause a short circuit or self discharge of the battery electrode plate. Use electrode plate brushes and headphones to clean the excess impurities on the electrode plate for welding, in order to prevent them from being damaged. If the electrode plate has unevenness, severe powder peeling, or holes, select them
3. How to weigh the electrode plate
When weighing and assembling the plates, it is necessary to first weigh a portion of the plates and arrange them on the workbench according to their weight, compare and mark the weight. Then, weigh the plates that have not been weighed and weigh each plate on the weighing instrument. Based on the weight of the plates weighed, place them together with the plates placed on the workbench, which saves some trouble(The smaller the weight difference between the positive electrode plates or groups, the better. The error of 10-14AH should not exceed 1 gram per group, and the error of 17-20AH should not exceed 2 grams per group
Package partition
1. After weighing, the plates are assembled according to the specified weight, and then packaged. The materials of the partitions are generally microporous rubber and fiberglass. When packaging, attention should be paid to the cleanliness of the partitions, and the plates should be placed in the middle of the partitions. If the position of the plates is aligned, they should be placed in the plate box
Kodi partition
2. Double pack the positive plate with a very thin separator, only lift up the positive plate without wrapping it, which can avoid short circuits caused by defects in a single separator. Single pack the plate with a separator, only package the positive plate without wrapping the negative plate in the packaging box, which is convenient and simple
Selection and Processing of Lead Parts
1. Lead parts include lead welding rods and poles, which are cast using specialized molds. Generally, the temperature is around 450 ℃, and lead oxidation is severe when the temperature is too high. Lead parts can cause cracks due to severe shrinkage, and it is not allowed to use iron tools to strike the molds. The produced lead parts should be as smooth as possible without sharp edges around them, and if there are, they should be trimmed
1. Cluster welding, welding is to weld the positive and negative poles together with lead to form a cluster, and use oxygen as a tool to connect the pole and busbar together-Acetylene
2. Place the packaged polar plates in the cluster box, insert the polar plates into the comb plate, first insert the negative electrode and then the positive electrode, so that the pole ears are fully inserted into the comb plate. If there are any gaps, manually tidy them up, and then place the gap between the positive and negative pole ears, bridge post, and pole post
3. Open the acetylene and oxygen and ignite them, adjust them to the appropriate size. Move the welding gun and welding rod to the position of the pole ear, then melt the lead bar and pole ear. After the busbar is basically welded, weld the pole together. If there are impurities such as lead ash during welding, they will be found. Welding the pole and busbar is a key process in the production process, and it is necessary to achieve firm welding without virtual welding or false welding. At this time, the impurities should be removed while welding, and finally the busbar should be filled
After welding the busbar, check for any defects and then proceed to the slot installation process. Generally, the cluster with terminals should be installed first, followed by other clusters, with the positive and negative poles arranged as follows+-,+-,+-,+-,+-,+-Connect in series, do not install the wrong polarity
When installing the polar plate slot, it is necessary to install it to the bottom, and then check whether the bridge column is normal. If there is any displacement, manually handle it and try to install the cover to see if it can cover the basic cluster slot
5. How to check the polarity group? First, let's measure whether the battery has a short circuit. If the voltage is zero or close to zero during measurement, it proves that the cluster needs to be checked to find the location of the short circuit for repair. If there is no short circuit, check whether the multimeter's positive and negative poles are connected properly and whether the displayed voltage is not negative. If there is, prove that the polarity is reversed, and then reinstall it into the battery slot
6. After detecting no faults in the electrode plates, the welding of the electrode group is crucial. Use bridge welding clamps to clamp the column, and use oxygen welding to weld the bridge column. During welding, ensure that the flame does not burn the battery shell to prevent the electrode columns from detaching from the group and smoothly closing. The battery cover is sealed and used in conjunction with a curing agent:Comparison of the ratio of 1. The prepared glue should be used in a timely manner to avoid long-term solidification. The solidification of the glue is closely related to temperature, and the higher the temperature, the faster the solidification. Therefore, it should be used as soon as possible. Additionally, heating equipment should be used for sealing
7. After the battery cover is completed, the pole welding should be carried out to check whether the lead out pole is in the middle position of the lead out hole. If it is not, it should be corrected. Then, the pole mold should be placed on the lead out pole and melted by oxygen welding. There is also a welding method, where the terminal is placed on the lead out pole in the correct position, melted with a soldering iron, and the terminal and pole are welded together. Attention should be paid during welding
Electrolyte configuration
It is prepared with pure water and concentrated sulfuric acid, and the density of the electrolyte used for automotive batteries is
1.280±0.005g/cm3((25℃).
② The container for preparing electrolyte must be acid and temperature resistant glazed ceramic, glass tank, plastic tank or lead lined wooden tank. When preparing, the staff must wear protective equipment;
Wash the vessels thoroughly before preparation and rinse with pure water;
When preparing, the required pure water should be placed in a container first, and then concentrated sulfuric acid should be slowly injected into the pure water and stirred continuously. It is strictly prohibited to inject water into sulfuric acid to avoid splashing and burning
The conversion formula is d25=dt+0.0007(t-25)
D25:25 ℃ electrolyte concentration dt:Electrolyte concentration at temperature t
0.0007: t:Actual measured electrolyte concentration
The main components of the electrolyte are distilled water and sulfuric acid. When preparing, the container must be acid resistant and clean
2. Staff should have safety awareness and wear acid resistant gloves and clothing during work. If sulfuric acid splashes onto the skin during operation, the skin should be washed repeatedly with clean water in a timely manner. When preparing, first pour distilled water into a clean container, then slowly introduce it, and use acid resistant tools to stir. If the temperature is too high, stop adding acid to prevent the acidity from splashing out. Mix to 1.1 at a temperature of 25 ℃:28 is sufficient. It is strictly prohibited to pour water into acid during configuration
3. The amount of acid added can only be calculated based on the amount of acid added, the capacity of the battery case, the density of acid added, and the assembly loss during charging and discharging, as acid is no longer drawn outward after assembly
Inject electrolyte
Unscrew the exhaust plug and make sure to penetrate the ventilation hole on the plug. There is a sealing gasket and sealing paper under the plug, which need to be removed after acid injection;
The electrolyte temperature must be cooled to below 30 ℃ before being poured into the battery;
Inject the prepared electrolyte into each cell, and mark the liquid level and outer shell of the plastic shell battery"max"Flat, the liquid level of the rubber groove battery should be 10 degrees higher than the partition-15mm;
Tighten the exhaust plug to prevent acid leakage


+'&media=https%3A%2F%2Fcbu01.alicdn.com%2Fimg%2Fibank%2F12921234588_345941986.jpg&description=Suitable+for+RYOBI+18V%2FP103%2FP108%2Fhand+drill+lithium+battery+power+tool+accessories'))